How to: Cast a tarantula (or any object) in resin
- Thread starter xhexdx
- Start date
- Joined
- Jul 20, 2007
- Messages
- 5,351
I have tried thinner layers, which results in more of them needing to be poured. I was doing this to try to minimize discoloration from the heat.
I was using a MM P. cambridgei, so there wasn't a whole lot to discolor.
I'll try and take some pics tonight and post them for you.
--Joe
I was using a MM P. cambridgei, so there wasn't a whole lot to discolor.
I'll try and take some pics tonight and post them for you.
--Joe
For anyone who is really interested, we will be having a class/workshop on casting arachnids in resin at the ATS conference this year. I don't know all the details yet but I expect it will be a hands on experience.
http://www.atshq.org/conference.htm
Ollie Meidinger
Public Relations Officer
American Tarantula Society
http://www.atshq.org/conference.htm
Ollie Meidinger
Public Relations Officer
American Tarantula Society
- Joined
- Jul 20, 2007
- Messages
- 5,351
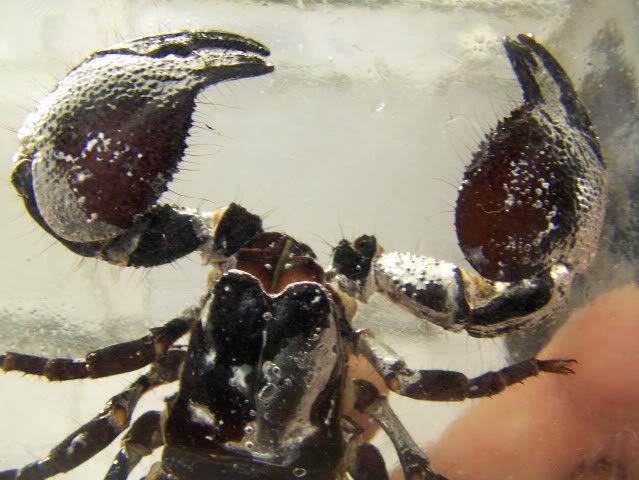
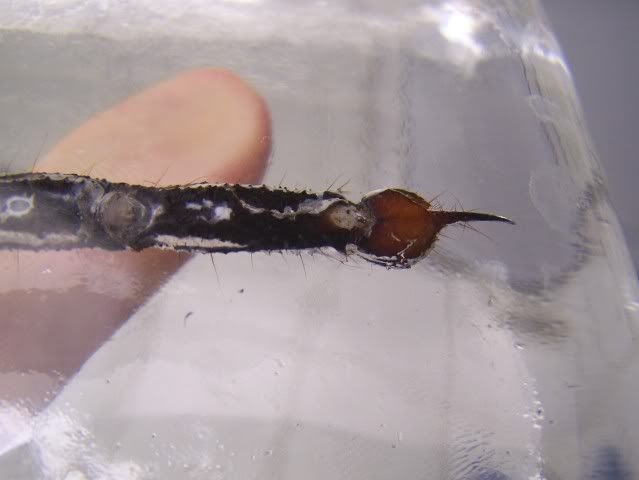
The scorp kept a lot of air with it; I'm a little disappointed.
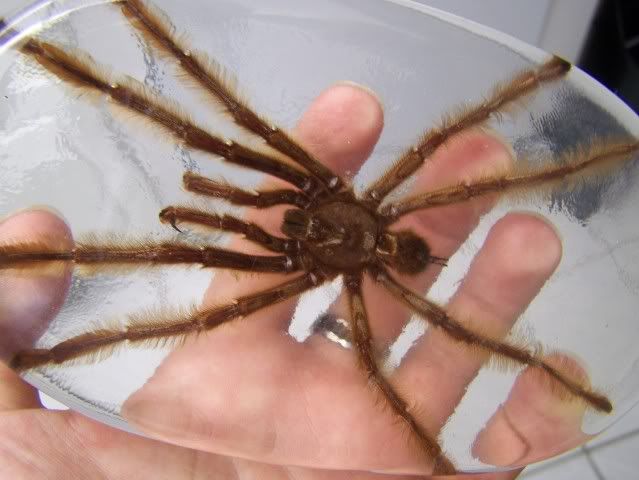
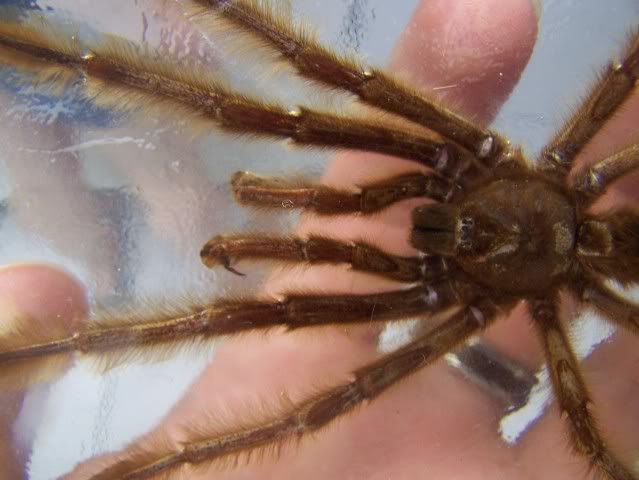
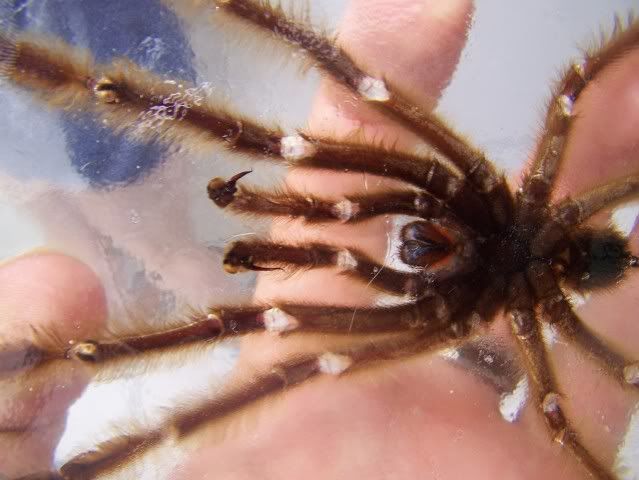
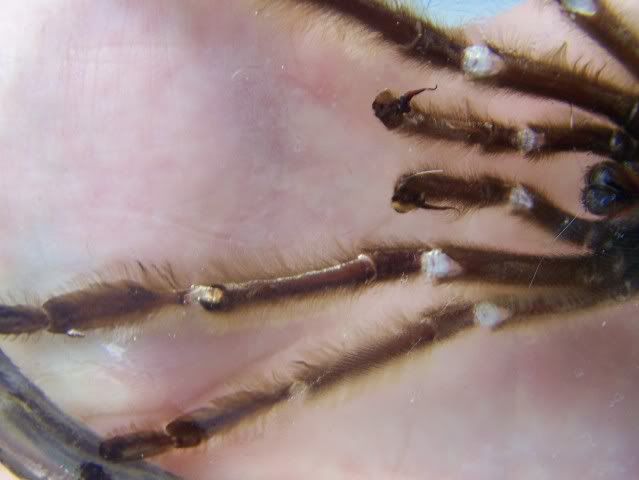
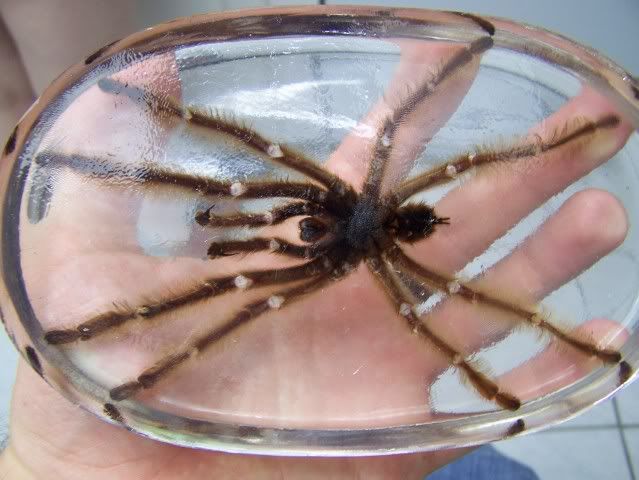
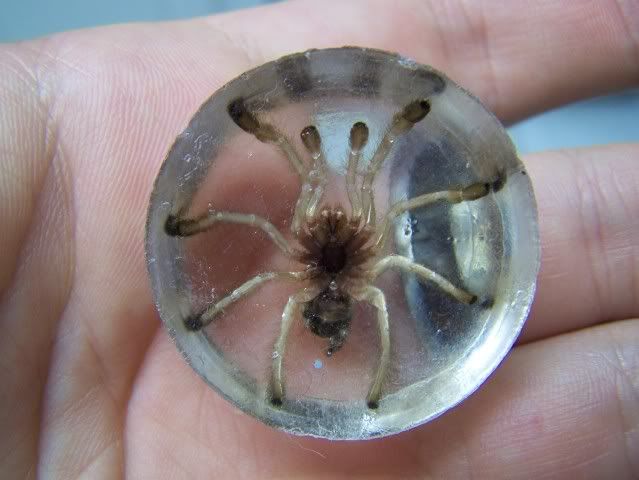
Here they are. P. cambridgei, A. bicegoi, and P. imperator.
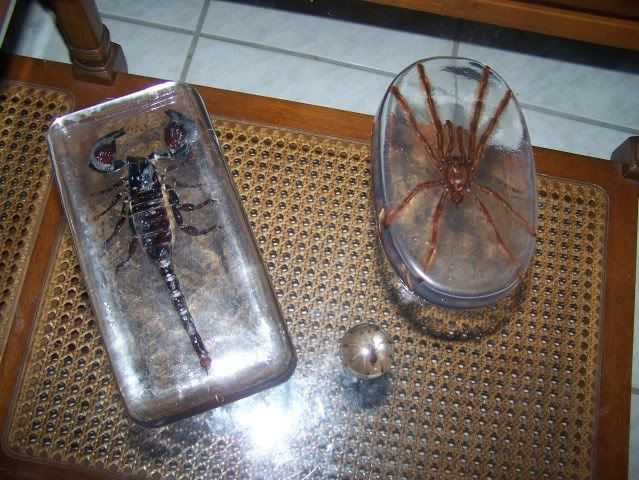


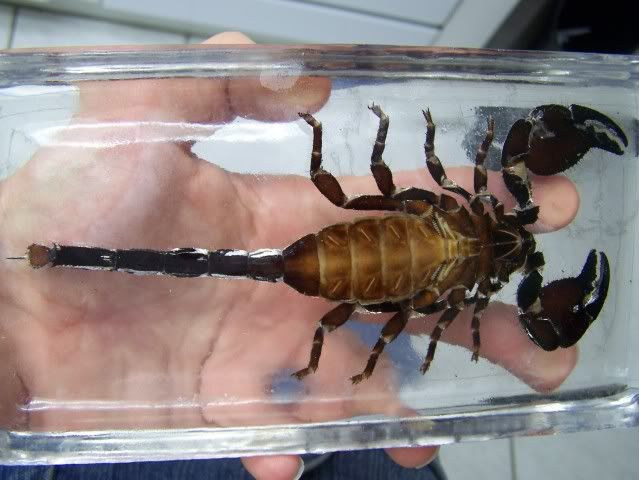
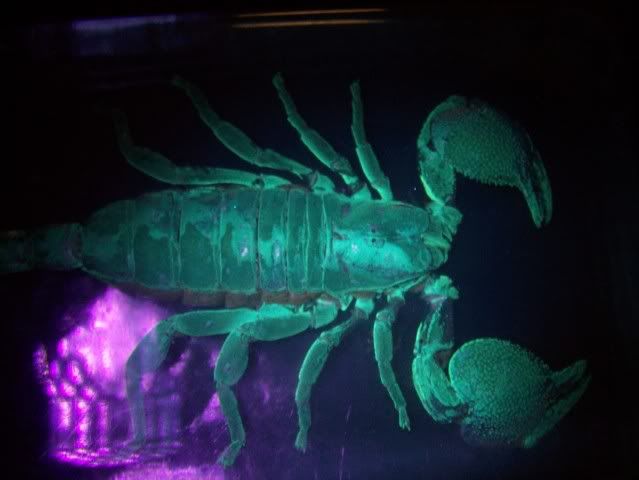
Bad shot but yes, it still fluoresces:
Here they are. P. cambridgei, A. bicegoi, and P. imperator.
Bad shot but yes, it still fluoresces:
- Joined
- Apr 22, 2009
- Messages
- 1,287
great job joe! I particularly like the little spiderling, shame that it died but nice that it can be kept like it is ")
- Joined
- May 14, 2004
- Messages
- 3,088
that's similar to how mine turned out when i did them years ago. it was alright, but to be honest the smoothness and clarity of the casting left more to be desired for me, and i was disappointed with the foggy appearence they took on in some patches, is this cause i messed up the process, or is it dependant on the grade of resin you use?
- Joined
- Jul 20, 2007
- Messages
- 5,351
It's probably a little of both. Although I don't know how you can mess it up in a way that would cause a foggy appearance, so perhaps it was the resin you were using.
I think out of my four, I like the way the P. cam turned out best.
--Joe
I think out of my four, I like the way the P. cam turned out best.
--Joe
- Joined
- Dec 16, 2007
- Messages
- 180
Great read with some amazing responses and insight.
Eventually I want to try this myself with a wide range of objects... makes neat semi-inexpensive personal gifts I think.
Eventually I want to try this myself with a wide range of objects... makes neat semi-inexpensive personal gifts I think.
- Joined
- Oct 1, 2009
- Messages
- 909
Great thread! Subscribed for when the time comes for my MM.
- Joined
- Jul 16, 2004
- Messages
- 1,677
Joe and All -
The acetone cuts through the air bubble and wets the specimen. Because the resin/hardener mixture is soluble in acetone it'll absorb the minute amount of acetone on the specimen and seal directly to the specimen's surface, sealing out any air.
In theory, this should also work for clearing the air bubbles from among the bristles of tarantulas.
HERE IS THE LIST OF WARNINGS AND DISCLAIMERS (Everybody's got a disclaimer!)
1. Acetone is almost explosively flammable. DO NOT use it near any open fires or flames! DO NOT smoke while using it!
2. Acetone is toxic. Use it only in a well ventilated space and DO NOT inhale the vapors.
3. DO NOT allow any acetone to splash onto any painted or varnished surfaces, plastic objects and other cast specimens! It'll ruin the polished surfaces.
4. DO NOT dispose of excess acetone by pouring it down household drains or pouring it on the ground or in ponds, streams, or other bodies of water. Call your local authorities (e.g., fire department, city dump) for specific disposal instructions.
5. Practice on one or two specimens of relatively low importance before using it on your prizes. I don't know that this practice is universally applicable to all specimens.
Now, cast yourself silly!
Here's a trick I remembered as soon as I saw your photo. From the paint department of your local hardware store, purchase a small bottle of acetone. Just before you begin to pour the resin/hardener mixture onto your specimen, dip the specimen into the acetone. The specimen MUST be moist with acetone as you pour the resin.The scorp kept a lot of air with it; I'm a little disappointed. ...
...
The acetone cuts through the air bubble and wets the specimen. Because the resin/hardener mixture is soluble in acetone it'll absorb the minute amount of acetone on the specimen and seal directly to the specimen's surface, sealing out any air.
In theory, this should also work for clearing the air bubbles from among the bristles of tarantulas.
HERE IS THE LIST OF WARNINGS AND DISCLAIMERS (Everybody's got a disclaimer!)
1. Acetone is almost explosively flammable. DO NOT use it near any open fires or flames! DO NOT smoke while using it!
2. Acetone is toxic. Use it only in a well ventilated space and DO NOT inhale the vapors.
3. DO NOT allow any acetone to splash onto any painted or varnished surfaces, plastic objects and other cast specimens! It'll ruin the polished surfaces.
4. DO NOT dispose of excess acetone by pouring it down household drains or pouring it on the ground or in ponds, streams, or other bodies of water. Call your local authorities (e.g., fire department, city dump) for specific disposal instructions.
5. Practice on one or two specimens of relatively low importance before using it on your prizes. I don't know that this practice is universally applicable to all specimens.
Now, cast yourself silly!
JonIverson
Arachnopeon
- Joined
- Jul 11, 2017
- Messages
- 49
I realize this is an old thread, but I had hoped to resurrect it. I have a pair of stag beetles that I want to try and embed in resin. Since it is a fairly expensive process, I've been hesitant to do it mainly for lack of complete instructions. I understand the part about pouring in layers to offset heating, floating and other things, but information on proper drying seems to be scattered. What I'd really like to try is doing the process under vacuum.... like using a simple bell jar with manual pump... I would think this would greatly reduce moisture and bubble concerns and not be at tremendous cost. However, finding such a process spelled out on the web seems impossible.
Anyway, I'm looking for complete instructions, and would appreciate hearing from those who have done it. Thanks!
Anyway, I'm looking for complete instructions, and would appreciate hearing from those who have done it. Thanks!
Trenor
Arachnoprince
- Joined
- Jan 28, 2016
- Messages
- 1,893
I think @EulersK might have done some of that (i remember something about the colors fading from the heat of the liquid resin) but I might be thinking about someone else. It was a long time ago.I realize this is an old thread, but I had hoped to resurrect it. I have a pair of stag beetles that I want to try and embed in resin. Since it is a fairly expensive process, I've been hesitant to do it mainly for lack of complete instructions. I understand the part about pouring in layers to offset heating, floating and other things, but information on proper drying seems to be scattered. What I'd really like to try is doing the process under vacuum.... like using a simple bell jar with manual pump... I would think this would greatly reduce moisture and bubble concerns and not be at tremendous cost. However, finding such a process spelled out on the web seems impossible.
Anyway, I'm looking for complete instructions, and would appreciate hearing from those who have done it. Thanks!
- Joined
- Feb 22, 2013
- Messages
- 3,291
Yeah, this process doesn't retain the color for spiders. Since their coloration comes from setae and is denatured by heat, any spider will turn out to be a burnt brown color after casting in resin. But other insects work just fine.
JonIverson
Arachnopeon
- Joined
- Jul 11, 2017
- Messages
- 49
The plan was for casting of male/ female stag beetles and male/ female cicada killer wasps. EulersK, sounds good, but what precise process did you use?
- Joined
- Feb 22, 2013
- Messages
- 3,291
I just bought the typical stuff at Hobby Lobby - it was about $20 for 16oz, not cheap. I never practiced it after my first attempt because of the coloration, but I'd suggest learning how to avoid bubbles before casting your only specimens. Bubbles were a huge issue for me.The plan was for casting of male/ female stag beetles and male/ female cicada killer wasps. EulersK, sounds good, but what precise process did you use?
Trenor
Arachnoprince
- Joined
- Jan 28, 2016
- Messages
- 1,893
To get rid of bubbles you need a vacuum chamber or a DIY equivalent.I never practiced it after my first attempt because of the coloration, but I'd suggest learning how to avoid bubbles before casting your only specimens. Bubbles were a huge issue for me.
JonIverson
Arachnopeon
- Joined
- Jul 11, 2017
- Messages
- 49
That's one of my purposes for trying to resurrect this thread, to try and learn more about the vacuum process. I would think the benefits would be elimination of bubbles with additional benefit of ridding moisture from the insect in a much shorter period of time. Problem is that I see next to nothing on the web about the actual process and equipment needed i.e. would a simple hand held vacuum pump with bell jar be enough, is something more elaborate needed, etc. On a side note, there is a guy in Japan who resin embeds his beetles and pours his resin through a panty hose filter to rid bubbles. This seems to work very well for him.To get rid of bubbles you need a vacuum chamber or a DIY equivalent.
JonIverson
Arachnopeon
- Joined
- Jul 11, 2017
- Messages
- 49
That's what I have here also, the resin from Hobby Lobby, but I've since come across resin that's guaranteed not to yellow over time for not much more cost. I haven't yet ordered any, but will once I figure out the right process I'm going to need.I just bought the typical stuff at Hobby Lobby - it was about $20 for 16oz, not cheap. I never practiced it after my first attempt because of the coloration, but I'd suggest learning how to avoid bubbles before casting your only specimens. Bubbles were a huge issue for me.
Trenor
Arachnoprince
- Joined
- Jan 28, 2016
- Messages
- 1,893
I'd recommend a electric pump. I've degassed mead before with a hand pump and it's not a lot of fun.That's one of my purposes for trying to resurrect this thread, to try and learn more about the vacuum process. I would think the benefits would be elimination of bubbles with additional benefit of ridding moisture from the insect in a much shorter period of time. Problem is that I see next to nothing on the web about the actual process and equipment needed i.e. would a simple hand held vacuum pump with bell jar be enough, is something more elaborate needed, etc. On a side note, there is a guy in Japan who resin embeds his beetles and pours his resin through a panty hose filter to rid bubbles. This seems to work very well for him.
Here is a video that shows some of the process. You can likely find a lot of DIY videos for making one.