Good advice / techniques for taking decent invert photos w/ a phone?

advan

oOOo
Staff member
Joined
Apr 11, 2010
Messages
2,086
Glare!!

How do you great shot takers mitigate glare? I have the hardest time capturing what I want as all I see is the background shining on the enclosures.
Take them out if you want the best pictures. When using flash, do not shoot straight on, the flash will reflect right back into the lens if you do. With flash, always diffuse it. Anything can work from purpose made diffusers to white printer paper a few inches from the flash bulb. If not using flash, darken the room, set a flash light on top of the enclosure.

Not too versed on cellphones but their cameras are getting better. If you want to blow up that photo and print, that's where they are lacking and the quality will not be there. But for online photos and forums they can just fine. I know their autofocus searches badly, so work on lighting and also composition. -Chad
 

The Snark

Dumpster Fire of the Gods
Old Timer
Joined
Aug 8, 2005
Messages
11,048
My degree is in photography from back in the film days.
Electronics wise my preferred field is tube amplifiers. Welcome to the anachronism club.

When using flash, do not shoot straight on, the flash will reflect right back into the lens if you do. With flash, always diffuse it.
Ambient light diffusion, intensity and spectrum. A world unto itself. Compare the capabilities of the various space telescopes when it comes to the spectrum. No such thing as one correct spectrum works best for all.

Not too versed on cellphones but their cameras are getting better.
Reliance on digital pre and post processing replacing lens quality and camera capability, The space telescope differences clearly show there is a very finite limit as to what digital can accomplish. An attempt at the best of all worlds compromise attempting to make the entire visible light spectrum conform and produce the clearest most accurate image that appeals to the eye. As any fine art aficionado will tell you, that can't be done.
A simple comparison between Van Gogh - preferred direct natural light, to Rembrandt - preferred dim indirect lighting. The best digital cameras of any sort simply doesn't work. They always deliver their IMHO of what the images should look like. Photo reproductions of the great masters is a study in ambient lighting adjustments and precise camera settings. Just view Van Gogh landscapes in a room using dim indirect light or visa versa. The eye misses an almost comical amount of the artists original intents. Digital from tthe best of the best cell phones? A very unhappy compromise.
 
Last edited:

Tbone192

Arachnoknight
Active Member
Joined
May 28, 2020
Messages
220
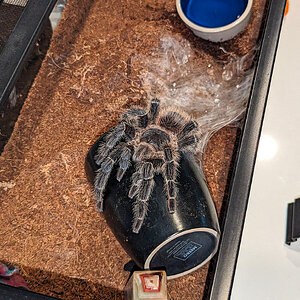
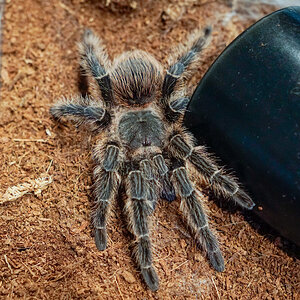
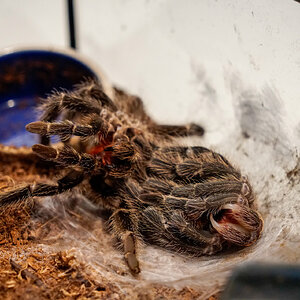
If you don't have the best camera on your phone, focus on editing the image in post, after taking photo. I find you can make any pic look at least a bit better with tools. Here is a quick picture I took of my P.murinus with my phone, editing was done with standard free photo app that was already on phone. The original looks like a blurry brown mass on the screen.
 

Attachments

Tbone192

Arachnoknight
Active Member
Joined
May 28, 2020
Messages
220
Does iPhone SE have a built in quality macro lens?? How do you figure this stuff out.
Here are the specs for iPhone SE Camera, honestly looks pretty good. Don't think anything really beats a Google pixel 7, in terms of phone camera quality but the difference is negligible. Especially if you are editing images after taking them.

Camera
12MP Main camera
ƒ/1.8 aperture
Digital zoom up to 5x
Portrait mode with advanced bokeh and Depth Control
Portrait Lighting with six effects (Natural, Studio, Contour, Stage, Stage Mono, High-Key Mono)
Optical image stabilization
Six‑element lens
True Tone flash with Slow Sync
Panorama (up to 63MP)
Sapphire crystal lens cover
Autofocus with Focus Pixels
Wide colour capture for photos and Live Photos
Deep Fusion
Smart HDR 4
Photographic Styles
Advanced red-eye correction
Auto image stabilization
Burst mode
Photo geotagging
Image formats captured: HEIF and JPEG
 

gambite

Arachnoprince
Arachnosupporter +
Joined
Nov 8, 2007
Messages
1,020
For phone photography, some thoughts;

- understand general photography first. A firm understanding of the "exposure triangle" is a must. Without this, you are just clicking buttons blindly hoping to get lucky. Understand what ISO, aperture, and shutter speed are, and how they each influence the photo, and get a sense of what these values are for your phone's camera(s). If you cant see this in-camera on your phone, then you can use something like Google Photos app to display these values under the details of your photos.

- get a better phone. You will not automatically take better photos, but you'll at least have the best possible equipment for it. I use the Pixel 6 Pro, since at the time of purchase it was one of the best camera's on a phone.

- better lighting. Even the best phones' photos turn into mush quickly as the ISO increases. Unlike a "real" modern digital camera, where ISO up to 3200 can still look great, phone camera sensors in my experience tend to quickly look like poop once they hit about 400 ISO or higher. So you need to provide a lot of light in order to keep the camera's automatically chosen ISO values as low as possible. Indoors, like in your dining room, the light levels can be surprisingly low even if the room looks bright to you. More light lets your camera take a clearer photo. And higher quality lighting setups will bring out the best attributes of your subject too. Does not necessarily need to be expensive gear, but some thought and research and practice and experience helps a lot here.

- don't crop and don't zoom in. Related to the above, even the best phone cameras' photos will look like hot donkey butt if you zoom in even a little. These cameras tend to be heavily optimized for viewing photos on small high ppi phone displays at their native resolution. If you crop or zoom in at all, you will quickly see the mush of smudgey pixels that the camera's high 4096px resolution was trying to hide. Remember that most phones' "zoom" features in-camera are merely digital zoom, meaning its just cropping your image for you. To mitigate this you need to really focus on filling the entire frame with your subject.

- beware of minimum focus distance. While you are following the above guidelines and trying to fill the camera frame with your invert, you will undoubtedly end up moving your camera closer and closer to the subject, to the point where the camera will no longer be able to focus on it anymore. All camera lenses have a minimum distance beyond which they cannot focus. You'll find yours quickly with practice. This combination of minimum focusing distance + small invertebrate subject not filling the frame will be a killer if you want to try and get a good photo with your phone.

- sensor size matters. Things like "megapixels" (MP) are largely irrelevant. A MP rating of 12-24MP is just fine and will be standard on most all cameras at this point. This can be hard to dig up, but if you can you should try to determine what your phone camera's sensor size is, if only to understand how your sensor relates to other models of cameras, especially if you plan to upgrade or compare results.

- don't plan to print. While the phone camera photos might look great on your phone, you will experience rapid disappointment as you see your image displayed on larger and larger screens or papers. For "fun" prints, I actually like to use the Fuji Instax Link Wide printer, which gives you 2"x3" photos, perfect size to stick on your fridge. If you use a "real" printer, like my favorite Printique ( https://www.printique.com/ ), you might be able to get away with as large as 4"x6". I probably wouldnt try to go much larger than that.

- use post processing. Even if I took a photo on my phone camera, I still prefer to import the JPG (**not** the raw DNG file) into the Lightroom CC mobile app for some light editing. My usual quickie workflow is something like Auto Straighten if needed, Auto Exposure -> boost the Shadows a little more if needed, Auto White Balance -> edit White Balance some more, and maybe a little Vignette. Rarely needs much more than that but the results come out noticeably better.

- practice photography with a real camera. It doesnt need to be an expensive camera, as someone here already posted, you can get incredible results with an old $100 DSLR. I am a fan of Nikon for this, because their late-90's era 35mm film camera lenses often had Auto-Focus capabilities (esp. the AF-D line of lenses) that is still compatible with some of their early-00's digital DSLR cameras. Alternatively, if you wanted to start with something slightly more modern, you could go for the likes of Sony A6000 etc. with one or two carefully selected lenses. You can get cheaper used cameras and lenses from such websites as MPB and KEH. If you are savy you can also snag a lot of decent gear from eBay too. There's no reason to invest heavily on brand-new gear if you are just starting.

I am not an expert at invert photography or anything, but I have been messing with photography for a few years now, and these are the things that come to mind for me especially in regards to using your phone. I actually use my phone a LOT despite have several "real" photography kits. Such as;

- Sony A6500
- Sigma 30mm f/1.4
- Sigma 18-50mm f/2.8
- Sigma 56mm f/1.4

- Nikon F100 (35mm film), Nikon FE
- a slew of AF-D lenses and some older manual lenses

- Mamiya C330 (+lenses) and Yashica 120 format film TLR cameras

despite this, I still shoot a lot of stuff on my phone (Pixel 6 Pro), because its quick and easy. However, as I described here, the results are really not comparable. Here's a good example I took just the other day;

Pixel 6 Pro


Sony A6500 + 18-50mm f/2.8


Viewing this webpage on a phone, the differences might not be as stark, but on something like a 27" 4K monitor, its readily apparent how much greater the level of clarity is in the Sony image. And that is after both images have been scaled down for Arachnoboards. Notice also the differences in Depth of Field; on the Sony I was actually struggling to maintain a deep enough DoF to get the T's eyes + portion of the legs in focus, but on the phone everything is in focus. This is largely due to the differences in sensor size; a larger sensor generally allows you to capture narrower and shallower DoF with a given lens focal length + aperture value. There's a lot more technical aspects going on as well, but these kind of things can give your photos a serious upgrade in quality. A shallow DoF is generally desirable in such close-up tight shots to give a better subject isolation and in effect a more "professional" aesthetic. This shot in particular is a good example;


the shallow DoF here is simply not possible with a phone's camera.

For these reasons, I strongly suggest that if you care about better photos, you really just gotta make the leap into a "real" camera. To be clear, in a lot of ways, it will actually be harder to get the best shots from a "real" camera when you are first starting out. There's a fair amount of technical details, and plain old practice, and research and study, that is required to make the most of your photo gear. But as you master the "real" camera you quickly find that the quality of images you can produce are massively higher than anything you could have made on even the best phone. As you gain this experience and insight, you can in turn go back to your phone and figure out how to take better images with it as well.
 
Last edited:

Introvertebrate

Arachnoprince
Arachnosupporter
Joined
Dec 18, 2010
Messages
1,198
Does anyone have any good advice / techniques for editing lazy spelling on a thread title?
 

The Snark

Dumpster Fire of the Gods
Old Timer
Joined
Aug 8, 2005
Messages
11,048
Angles and lighting go a long way!
I'm the bottom 1% of photographers, barely remembering the basics. I've been trying to teach those basics to my other for years. 1. Hold camera still. 2. Don't point at the light source.
She's on a first time ever family reunion in South Thailand. I got a cryptic request from her last night. "Could you fix these up?" I followed the link and let the download commence. About 9 hours later. 68 GB of video and pictures, mostly RAW. Bright sky, dark shadows and blurs. I sent back an even more cryptic reply: "GIMP does not stand for Goddess Intervention Major Post-processing."
 

DonaldJ

Arachnopeon
Joined
Dec 11, 2023
Messages
36
Plenty of great advice, don't think you can go wrong with any of the suggestions but I'd like to add one thing. Before you start throwing money at your dilemma just shoot, shoot, and shoot some more with whatever you have to shoot with. Experiment and maybe go a little nuts, developing an understanding of what's going on when you make the slight adjustments in focus, framing, exposure, angle, all that good stuff. Soon you will gain a sense of what you will need; the photography rabbit hole is deep and vast but don't forget to have fun while you develop your "eye."

By golly, it used to be if you didn't develop your own film you had to wait a few days to get a proof sheet from the lab, and we LIKED IT! And digital will never replace film, especially with color and furthermore...what? Really? It has??? Oh, never mind.
 
Top