TechnoGeek
Arachnosquire
- Joined
- Aug 13, 2019
- Messages
- 125
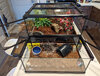
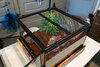
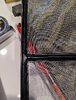
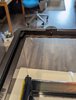
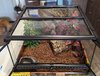
It would be far more price efficient to find a used (but not abused) fish tank on Facebook marketplace, make sure it's the right size, and repurpose it to serve as your tarantula's enclosure. That's what I do anyways, and I seldom had to pay more than 30 bucks. Plus you're taking something that otherwise could've went to a landfill so you're being nice to the environment.
In any case, don't use acrylic. It's overpriced and yet these enclosures are about as durable as a daddy's princess in the navy seals' hell week. Obviously Ts aren't gonna scratch at it like reptiles would, so they won't leave it looking like a kitty's scratch post as fast, but I find they still end up looking ugly within a few months.. kinda defeats the purpose of a display habitat.
In any case, don't use acrylic. It's overpriced and yet these enclosures are about as durable as a daddy's princess in the navy seals' hell week. Obviously Ts aren't gonna scratch at it like reptiles would, so they won't leave it looking like a kitty's scratch post as fast, but I find they still end up looking ugly within a few months.. kinda defeats the purpose of a display habitat.