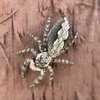
How To Take Identifiable Photos of Jumping Spiders

Nicole C G

Arachnoangel
Joined
Jun 23, 2021
Messages
882
With summer here/almost here, jumping spiders are everywhere. And with the increase of Jumping spiders, the numbers of people seeking jumper identification increases, naturally. So here is a guide on how to take proper photos with the highest chance of being able to be identified.


Before we talk about photos though, there are other things just as important. Location is very important to include. Where you found it too. If you are able to measure it, or even get a rough idea of the size, include that too.

An example of an informative description would be:

“Hello! I was walking at the park when I saw this little jumping spider hoping on some sunny rocks. I was wondering if anyone knows what species it could be. It was about 5mm. It was found in Denton County, Texas (USA). “

As used in the example, city/county is best when it comes to location. Even within one state there can be species that live on one side of the state but not the other. So be as specific as you feel comfortable.


Now onto photos.

First, make sure your photos are clear/mostly clear. You want to be able to see the patterns and shape of the spider. Usually a phone camera is enough. If it’s a smaller spider, use a magnifying glass or macro lens. Make sure there is sufficient lighting to see the patterns properly.
Usually for identifying the species, we will need a photo of the top (dorsal), a photo of the side, and a photo of the face. Any other angles are appreciated. If you are wanting to identify the gender/age of the spider as well, a photo of the underside (ventral) is needed. It can occasionally help with identifying species too. When photographing the underside, take the picture with flash on. This can help because the light will reflect off of the epigynum if it’s an adult female.

3C498CF4-47C7-4075-A3F6-E9063CE14F51.jpeg AF22A13E-AC44-4AA0-AC5E-8A93616A963E.jpeg C0942D0C-F1BC-4AEE-BCF6-8E0C3552D134.jpeg DA66156F-F3C5-4365-8EB5-8E5864F2233E.jpeg
-Great angles for ID.

708B09F4-8FCF-42FB-AE90-78A316389076.jpeg
-(different spider than the last one) flash on, reflecting on epigynum making it more visible, meaning it’s an adult female.

These are good places to start. And of course, sometimes less photos or more photos are required. For instance, with only one photo, I can identify this as being an adult male Naphrys pulex.
3DD6C69C-A99F-4C4A-84A9-37BAE125F25F.jpeg


And you don’t need to have the greatest photos. These are identifiable too:
3B359977-60F1-45B6-9B2B-B407C5A828D3.jpeg 7503704C-C268-491E-B203-6CCAD94E422B.jpeg 84F2125B-CB3F-4A7C-A3D1-AC99B6A0A32F.jpeg


And if you see jumpers breeding, it’s simple to determine age and gender. The one on the top is always an adult male, and the one on the bottom is always an adult female.
76E09DB6-73BF-453E-9503-324974391866.jpeg
 

Nicole C G

Arachnoangel
Joined
Jun 23, 2021
Messages
882
Examples of why different angles are needed
These photos would be welcome additions if there are other photos of different angles. However, if these are by themselves, they are undesirable.
A8780445-2E29-4138-BEA4-1C478E00A4F0.jpeg
-underside is hard to identify to species.

EE98C67C-8A41-4E9F-B81A-AAFD25B2E8F6.jpeg
-dark, blurry, and only a view of the face. It’s hard to make out.

8608556C-102F-4F02-9019-72A7A3256BE2.jpeg
-underside+face. Still hard to identify, as it is blurry and dark.

EC070526-E384-4636-B303-8A4A7CC5E04E.jpeg
-very bright, angle doesn’t show shape of the spider very well.

A6591E2A-939E-4BC6-B5D9-7ED6AC4D75D3.jpeg
-view of the abdomen only makes it hard to visualize overall shape

1353E644-1941-4E49-8A85-C3EA49957C22.jpeg
-while the photo is good quality, it only shows the face and the rest is cast under shadows.
 

LadyShia77

Arachnobaron
Joined
Apr 18, 2022
Messages
317
These are awesome points. Sadly, I only have a phone camera and it is often very temperamental lol. If I don't have the zoom and lighting just right, I usually don't get a very good pic. Some enclosures are better for pictures while others are not. The cups with the vented lids are hit and miss. I love the pics you posted, though, and am a bit envious that you were able to get such nice pics. What are the specs on the camera you used? If you don't mind my asking.
 

Nicole C G

Arachnoangel
Joined
Jun 23, 2021
Messages
882
These are awesome points. Sadly, I only have a phone camera and it is often very temperamental lol. If I don't have the zoom and lighting just right, I usually don't get a very good pic. Some enclosures are better for pictures while others are not. The cups with the vented lids are hit and miss. I love the pics you posted, though, and am a bit envious that you were able to get such nice pics. What are the specs on the camera you used? If you don't mind my asking.
I’m not sure what the specs are (or what specs means 😅)
I use an iPhone XR camera if that helps. In addition, I clip the APEXEL 12x/24x macro lens onto it, to get the close ups. 3773DAE4-4C6A-4348-9560-25A835CED5D1.jpeg
 

LadyShia77

Arachnobaron
Joined
Apr 18, 2022
Messages
317
I’m not sure what the specs are (or what specs means 😅)
I use an iPhone XR camera if that helps. In addition, I clip the APEXEL 12x/24x macro lens onto it, to get the close ups. View attachment 418952
I guess specs as in the type of camera, what mega pixels the camera has, etc. I'm still new to this lol. I have a Samsung Galaxy A10e and thought the camera would be better than what it is. It has panorama and HD, but none of those help with getting good close pics.
 

Eagle555 Jumping spiders

Arachnosquire
Joined
May 11, 2022
Messages
90
With summer here/almost here, jumping spiders are everywhere. And with the increase of Jumping spiders, the numbers of people seeking jumper identification increases, naturally. So here is a guide on how to take proper photos with the highest chance of being able to be identified.


Before we talk about photos though, there are other things just as important. Location is very important to include. Where you found it too. If you are able to measure it, or even get a rough idea of the size, include that too.

An example of an informative description would be:

“Hello! I was walking at the park when I saw this little jumping spider hoping on some sunny rocks. I was wondering if anyone knows what species it could be. It was about 5mm. It was found in Denton County, Texas (USA). “

As used in the example, city/county is best when it comes to location. Even within one state there can be species that live on one side of the state but not the other. So be as specific as you feel comfortable.


Now onto photos.

First, make sure your photos are clear/mostly clear. You want to be able to see the patterns and shape of the spider. Usually a phone camera is enough. If it’s a smaller spider, use a magnifying glass or macro lens. Make sure there is sufficient lighting to see the patterns properly.
Usually for identifying the species, we will need a photo of the top (dorsal), a photo of the side, and a photo of the face. Any other angles are appreciated. If you are wanting to identify the gender/age of the spider as well, a photo of the underside (ventral) is needed. It can occasionally help with identifying species too. When photographing the underside, take the picture with flash on. This can help because the light will reflect off of the epigynum if it’s an adult female.

View attachment 418934 View attachment 418935 View attachment 418936 View attachment 418937
-Great angles for ID.

View attachment 418938
-(different spider than the last one) flash on, reflecting on epigynum making it more visible, meaning it’s an adult female.

These are good places to start. And of course, sometimes less photos or more photos are required. For instance, with only one photo, I can identify this as being an adult male Naphrys pulex.
View attachment 418944


And you don’t need to have the greatest photos. These are identifiable too:
View attachment 418940 View attachment 418941 View attachment 418939


And if you see jumpers breeding, it’s simple to determine age and gender. The one on the top is always an adult male, and the one on the bottom is always an adult female.
View attachment 418942
I suck at photography on my iPod 😂 she’s hiding but I did post that pic in my forum so tell me if you need more I will take some when she gets out. Btw is it ok to put a clip on reading light on top of the cage for light?? ( white light )
 

Nicole C G

Arachnoangel
Joined
Jun 23, 2021
Messages
882
I suck at photography on my iPod 😂 she’s hiding but I did post that pic in my forum so tell me if you need more I will take some when she gets out. Btw is it ok to put a clip on reading light on top of the cage for light?? ( white light )
I use a reading lamp for my jumpers too.
 

viper69

ArachnoGod
Old Timer
Joined
Dec 8, 2006
Messages
18,581
With summer here/almost here, jumping spiders are everywhere. And with the increase of Jumping spiders, the numbers of people seeking jumper identification increases, naturally. So here is a guide on how to take proper photos with the highest chance of being able to be identified.


Before we talk about photos though, there are other things just as important. Location is very important to include. Where you found it too. If you are able to measure it, or even get a rough idea of the size, include that too.

An example of an informative description would be:

“Hello! I was walking at the park when I saw this little jumping spider hoping on some sunny rocks. I was wondering if anyone knows what species it could be. It was about 5mm. It was found in Denton County, Texas (USA). “

As used in the example, city/county is best when it comes to location. Even within one state there can be species that live on one side of the state but not the other. So be as specific as you feel comfortable.


Now onto photos.

First, make sure your photos are clear/mostly clear. You want to be able to see the patterns and shape of the spider. Usually a phone camera is enough. If it’s a smaller spider, use a magnifying glass or macro lens. Make sure there is sufficient lighting to see the patterns properly.
Usually for identifying the species, we will need a photo of the top (dorsal), a photo of the side, and a photo of the face. Any other angles are appreciated. If you are wanting to identify the gender/age of the spider as well, a photo of the underside (ventral) is needed. It can occasionally help with identifying species too. When photographing the underside, take the picture with flash on. This can help because the light will reflect off of the epigynum if it’s an adult female.

View attachment 418934 View attachment 418935 View attachment 418936 View attachment 418937
-Great angles for ID.

View attachment 418938
-(different spider than the last one) flash on, reflecting on epigynum making it more visible, meaning it’s an adult female.

These are good places to start. And of course, sometimes less photos or more photos are required. For instance, with only one photo, I can identify this as being an adult male Naphrys pulex.
View attachment 418944


And you don’t need to have the greatest photos. These are identifiable too:
View attachment 418940 View attachment 418941 View attachment 418939


And if you see jumpers breeding, it’s simple to determine age and gender. The one on the top is always an adult male, and the one on the bottom is always an adult female.
View attachment 418942
3rd one down— what gear did you use? It’s your clearest one ever! You’ve made huge gains since you first started!!
 

Nicole C G

Arachnoangel
Joined
Jun 23, 2021
Messages
882
3rd one down— what gear did you use? It’s your clearest one ever! You’ve made huge gains since you first started!!
Thank you! All I use is my phone (iPhone XR) and a 12x macro clip on lens. The sun was in the right place, the jumper posed good, and I held my phone steady. I actually took the photos of that one last November. Still some of my favorite shots. A634A870-F07B-4DAA-AD0D-99D285DA0A91.jpeg
 

regalpaws

Arachnoknight
Joined
Mar 10, 2022
Messages
232
I've been wanting to get into macro photography/videography. I was looking at the Apexel 100mm macro lens as well. The 12x24 on amazon says that it is only used for close up pics (which both are lol) but it is best used 0.3 inches away from subject, while the 100mm is 0.91 inches away from subject. Curious of any ideas and opinions on the two?
 

Nicole C G

Arachnoangel
Joined
Jun 23, 2021
Messages
882
I've been wanting to get into macro photography/videography. I was looking at the Apexel 100mm macro lens as well. The 12x24 on amazon says that it is only used for close up pics (which both are lol) but it is best used 0.3 inches away from subject, while the 100mm is 0.91 inches away from subject. Curious of any ideas and opinions on the two?
I have used both of the lenses and they are both good! The 100mm one has more in focus, and you don’t have to go as close, but some detail is lost (I think that lens is10x)
You have to go closer to the spider with the 12x/24x one, and less is in focus, but you get more detail. Here is a comparison:

E8E95CCD-3BEF-4389-8B29-638DEAB227D8.jpeg
-the “100mm” one

38C3868E-C807-4A97-81FF-1B8B79E99CBB.jpeg
-the 12x/24x one (using 12x)
55FB0A39-412F-4D05-A0C5-7232A2F2BFA0.jpeg
6DE4B0B2-E8DD-4B0E-9E0D-86D816822A43.jpeg
-left is 12x/24x one, right is 100mm one
 

regalpaws

Arachnoknight
Joined
Mar 10, 2022
Messages
232
I have used both of the lenses and they are both good! The 100mm one has more in focus, and you don’t have to go as close, but some detail is lost (I think that lens is10x)
You have to go closer to the spider with the 12x/24x one, and less is in focus, but you get more detail. Here is a comparison:

View attachment 418974
-the “100mm” one

View attachment 418975
-the 12x/24x one (using 12x)
View attachment 418976
View attachment 418977
-left is 12x/24x one, right is 100mm one
Thanks so much!! I think I know which one to get now :D
 

Nicole C G

Arachnoangel
Joined
Jun 23, 2021
Messages
882
HAHA sorry, the 12x24 :D the difference in detail is amazing
Just a note, it comes with two lenses, the one with the uh lampshade looking thing, and one without. When screwed together they make 24x zoom, which I only use under controlled condition, eg indoors. Because it is very hard to use, and I rarely need it. Only for super tiny things.
Like this super tiny Synageles sp.
F34B62B9-2D4D-4E8C-ADC2-AA53B04D380C.jpeg
-one lens only (12x)

D6528F9A-5431-44E8-A5D9-216718AFE174.jpeg
-both lenses (24x) it gets pretty blurry

AND when they arrive, the lenses may be screwed together super tight. I used pliers with a cloth in the mouth of it to keep it from scratching, they unscrewed pretty easy that way.

AND AND when only using one lens, use the one without the lampshade thing. It’s the better one.
 

regalpaws

Arachnoknight
Joined
Mar 10, 2022
Messages
232
T
Just a note, it comes with two lenses, the one with the uh lampshade looking thing, and one without. When screwed together they make 24x zoom, which I only use under controlled condition, eg indoors. Because it is very hard to use, and I rarely need it. Only for super tiny things.
Like this super tiny Synageles sp.
View attachment 418981
-one lens only (12x)

View attachment 418982
-both lenses (24x) it gets pretty blurry

AND when they arrive, the lenses may be screwed together super tight. I used pliers with a cloth in the mouth of it to keep it from scratching, they unscrewed pretty easy that way.

AND AND when only using one lens, use the one without the lampshade thing. It’s the better one.
Thanks for the tips!! I cant wait to start experimenting with it. My phone has a decent camera with some submission lol I've been having fun with it but I wanna get into this more. Do you have any issues with the clip itself? The camera on my phone is center faced and I have a somewhat bulky case
 

Nicole C G

Arachnoangel
Joined
Jun 23, 2021
Messages
882
T

Thanks for the tips!! I cant wait to start experimenting with it. My phone has a decent camera with some submission lol I've been having fun with it but I wanna get into this more. Do you have any issues with the clip itself? The camera on my phone is center faced and I have a somewhat bulky case
Never had any issues with the clip. I remove my case whenever I use the lens because I have a silicone case. So I’ve never tried with a case on. I imagine the photos wouldn’t look too good with a case on. I have a corner lens, but have tried it on phones with a center camera and aside from not being able to see the screen a little bit, I didn’t have any problems. I got used to it quickly.
 

The Snark

Dumpster Fire of the Gods
Old Timer
Joined
Aug 8, 2005
Messages
11,409
A tip a pro photographer told me. Unless you are going for the $$$ lens and so on, all the basic macro lenses have a very poor depth of field. That is, a very precise distance from lens to subject, or part of the subject. The rest will be blurry. So when you focus on a spider, choose what part of the spider you want in focus. Thus as in @Nicole C G pics here most of a part of the spider is in focus but her focal distance is tiny, give or take around 1/4th inch between sharp and clear and blurred. So practice and patience is definitely in order.

(So there is no way a klutz like me can ever take a decent macro shot without dumb luck and maybe a little divine intervention)
 

SkittlesTheJumpingSpider

Arachnosquire
Joined
Sep 21, 2021
Messages
119
Thank you so much for this post! I just caught a new jumping spider (I'm debating if I should keep him or not,) and I'm planning on asking for an ID, so this will help a lot! Thanks again! :D

By the way, your photos are AMAZING! I also love your knowledge on all of the species!
 

Nicole C G

Arachnoangel
Joined
Jun 23, 2021
Messages
882
A tip a pro photographer told me. Unless you are going for the $$$ lens and so on, all the basic macro lenses have a very poor depth of field. That is, a very precise distance from lens to subject, or part of the subject. The rest will be blurry. So when you focus on a spider, choose what part of the spider you want in focus. Thus as in @Nicole C G pics here most of a part of the spider is in focus but her focal distance is tiny, give or take around 1/4th inch between sharp and clear and blurred. So practice and patience is definitely in order.
I agree 100%. Over time you learn the best angles for each species. To get the most valuable parts in focus.
 
Top