- Joined
- Dec 22, 2004
- Messages
- 3,883
(The long text is no nessessary read, just describing the entire process, errors and successes)
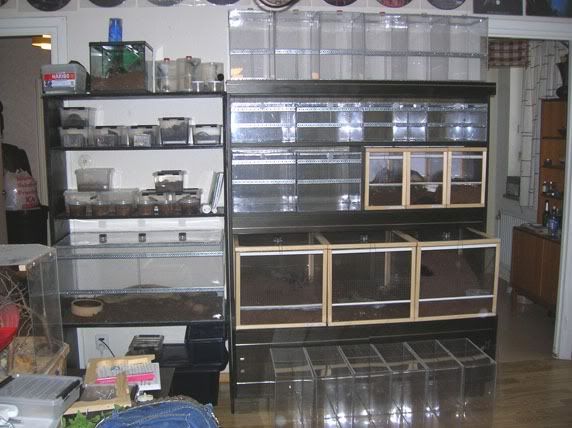
Here it is... the result of a small project I wanted to chip through during the christmas holidays... and which took a few months longer to complete (until yesterday).
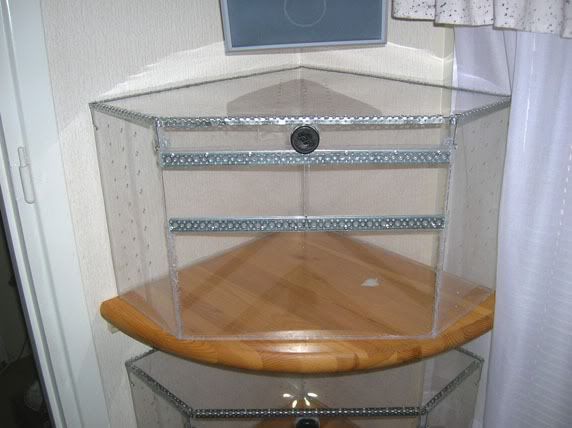
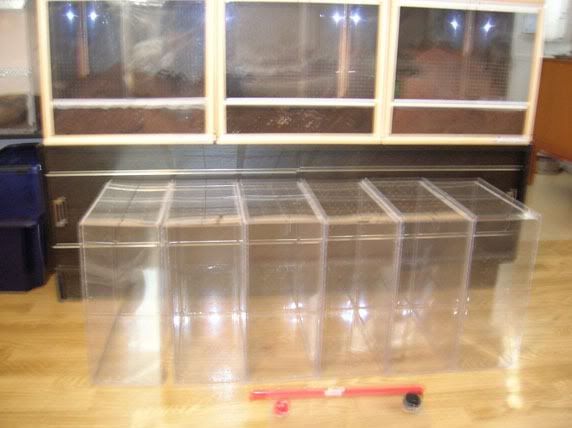
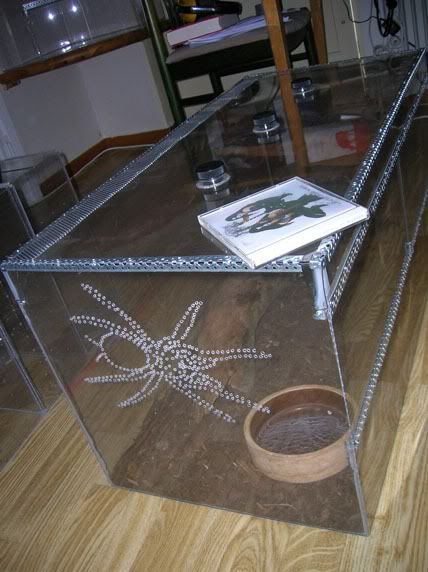
22 new tanks are finally finished... though being done I realized I need 4 more tanks... I'll build them when I need them though. The tanks I built now where in great part built ahead of time, so I don't have T's to fill most of them. Many of the animals are still too small, some have died during this time and some where just planned and built because I had the space for them.
First up:
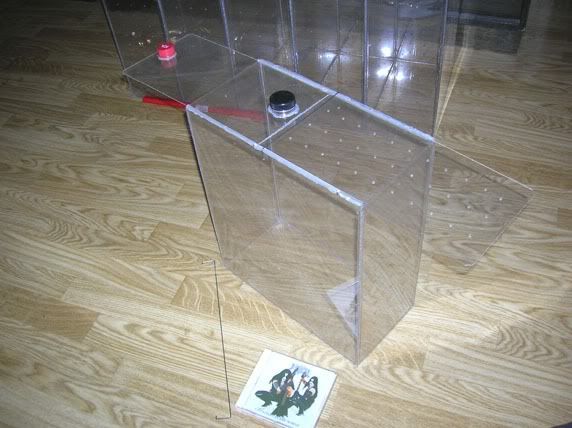
This is what I envisioned... it didn't turn out like that as you'll see. The tanks crossed out in red are purely imaginary, a concept so to speak. The six tanks not crossed out are actually there and where my initial stock of home made tanks. Those I had built about a year earlier and I learned a lot while building them. For example that 1.5mm plexi is a lot cheaper than glass. That the plexi is a lot more customizable but that it doesn't hold together well with silicone. They still stand but I'm skeptical that they will hold together forever.

So... I had to make some changes. For this big a project I had to go as cheap and practical as possible. The wood was to expensive, eventhough nice looking. It didn't either hold together well with silicone. My new sollution after a lot of brainstorming was this:
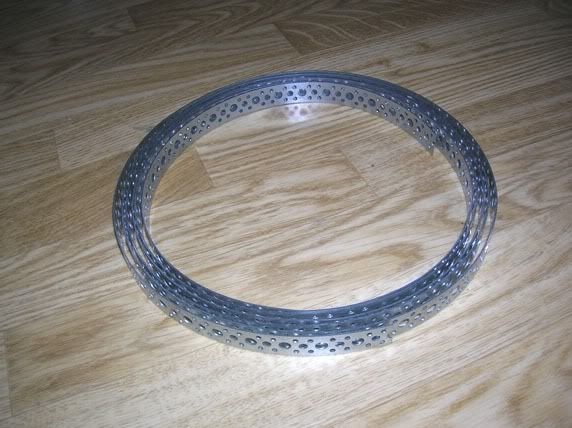
Yes, steel bands. They proved to be both a blessing and a curse. Cutting them to size was no problem. Bending individual corner pieces was no problem either. But actually hammering edge frames out of them was... no fun at all to put it mildly. On the contrary. The frames would always turn out warped (because the holes in the bands make straight hammering and bending impossible) so every single frame piece had then to be bend straight. Now imagine trying to bend an L-profiled piece of metal! If you apply pressure to one side, the other automatically comes out by the same amount, unless you basically use 3-4 hands applying pressure to the counterpoints too (or if you go at it with a great deal of patience). At times I'd apply too much pressure to it collapsing the entire frame piece and then having to bend it straight again from some very rediculously looking angle.
Well... But once they were kinda straight the problems weren't over. The prototype tank would turn out to look a complete mess: I had the very practical idea of riveting these bands to the plexi. Rivets hold (IF THEY ARE LONG ENOUGH!) pretty well. If they are too short, the rivet pulls through both plexi and metal and you have to manually drill the rivet head out of the frame piece. No fun at all! In one case the head pulling through the plexi completely messed up the plexi, I had to fix it by cutting it into shape again.
About the big mess I mentioned earlier - Those DIY bent L-profile bands looked straight enough so I tried applying them to all sides of the prototype tank. They were supposed to be the fundament to the tanks stability and shape. But they weren't: the tank ended up a competely warped mess and there was a lot of tension on it so there was no way I could simply manually bend or break it into shape after riviting on all the profile bands!
The bands where waaaay off for the kind of precission I needed for it to become a functional tank and the rivets pulling the bands and plexi together bent subsequently the plexi totally out of shape! I was this close to scrapping the entire project.
I had to come up with something else. ...Complete idea purge and a completely new start at everything... Making it simpler was the only way to go!
It took some time and thinking but I decided to go all plexi + bands + rivets + (and this is it: ) hot glue! (Not silicone!)
(The hot glue of choice: Industrial hot glue (stores more energy, longer staves), comming out of a full power 80W HG gun. If you have anything lower than 45W, throw it away, the glue will hold until you stop looking - IMHO)
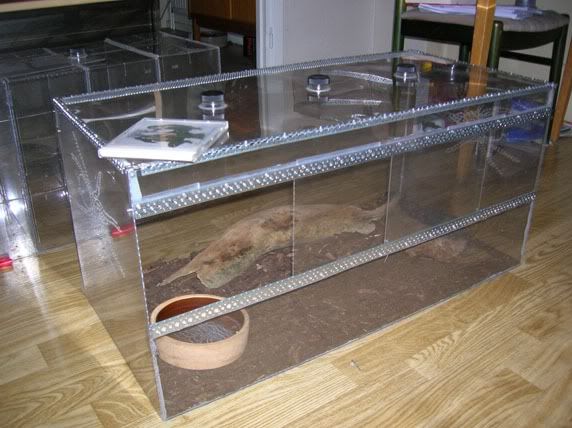
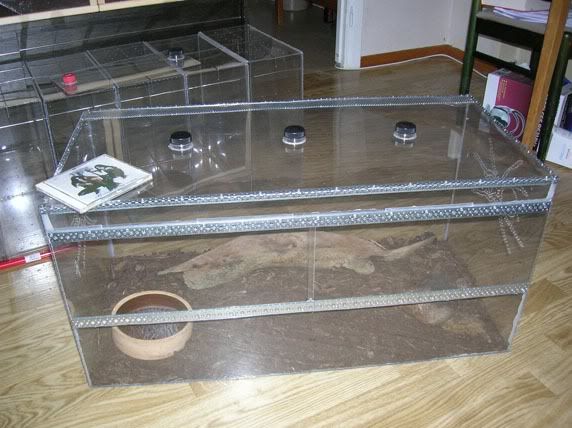
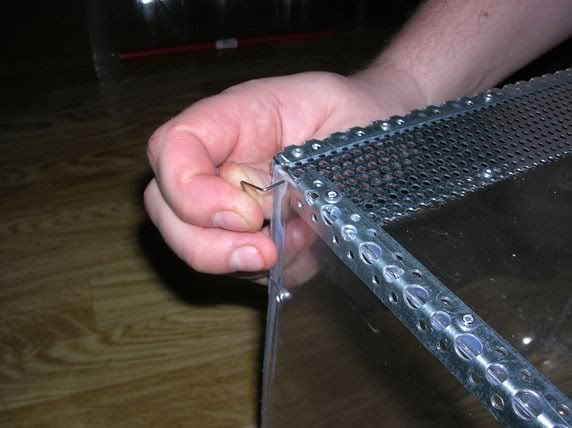
Now I'd only apply the L-profile bands to the lid, to keep it steady and escape proof (rivited ofcourse). In order to NOT have the rivets with the "out of shape L-profiles" bend the lid out of shape I did a smart thing: I HOT GLUED the profile pieces to the lid before riveting - thus eliminating all warps they carried with them. After doing that the lids ended up without tension, warps or other! (Oh happy day!") )
)
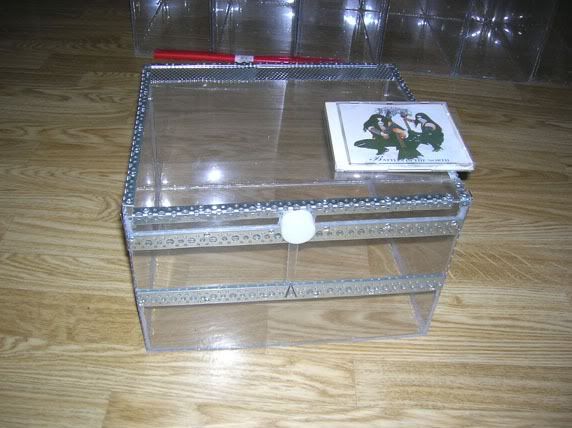
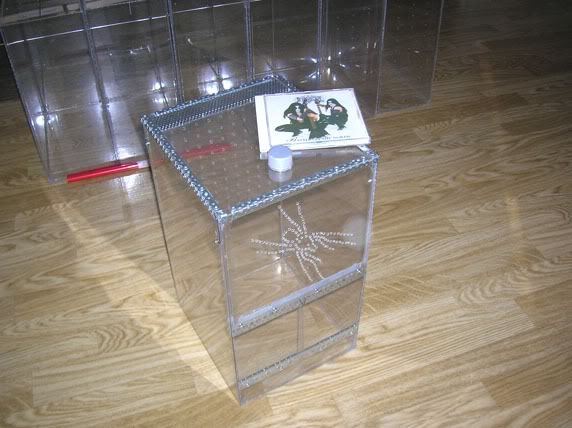
Here's what I'm talking about (the lid on the photo shows no hot glue between the profiles and the plexi - it's the only one that could be saved before changing strategy):
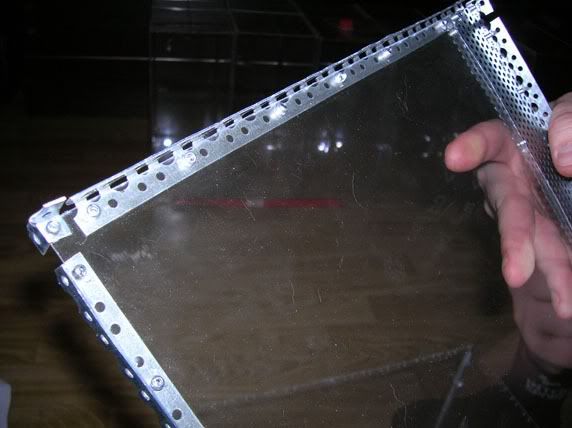
You can see a space between the rivets and the steel profile egde - that's where the tank wall is kept in place so it can bend neither in nor out, making the tank safer.
The rest of the tank would be hot glued together in its entirety.
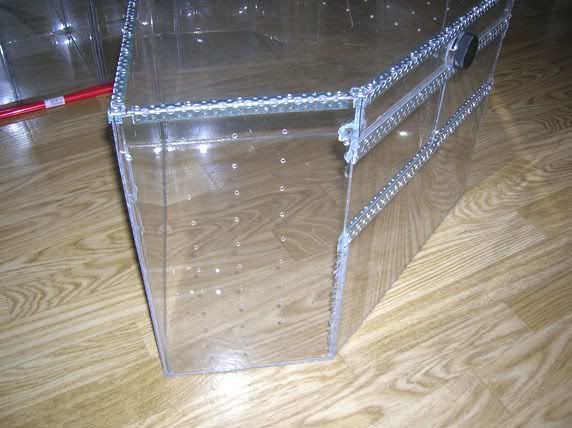
Now... I wanted both a removable lid and sliding doors. Trying to keep it cheap I had to build the door sliders myself too. Obviously I had to remember making the top slider deeper than the bottom one so that the doors could be removed. Making the sliders out of the same bands as presented earlier was no less of a challenge but once I figured it out it was at least pretty straight forward.
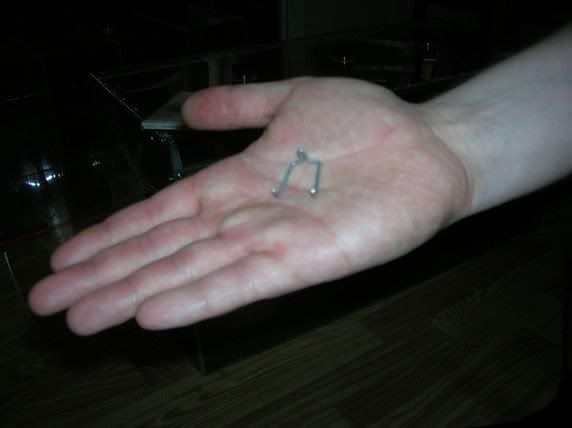
Here you can see the bottom slider of a tank, including the lock holding the doors in place. The lock can only be pulled out, not be pushed out from the inside and since it's made of piano wire it sits pretty tight and can not fall off by itself either.
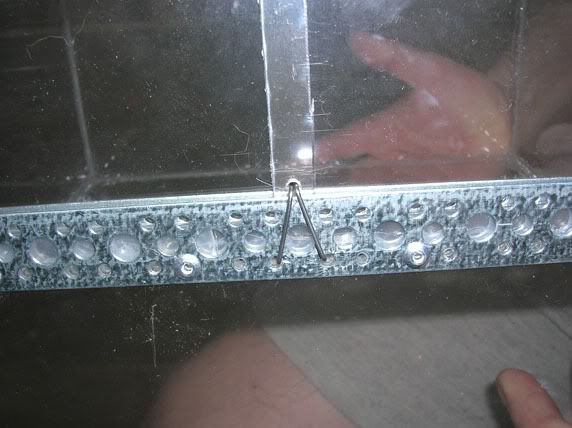
On the picture above you also see the rivets, plus plastic shining through the holes of the metal band. The plastic you can see there is what holds the doors up to the right height to create the bottom-slider-door-groove.
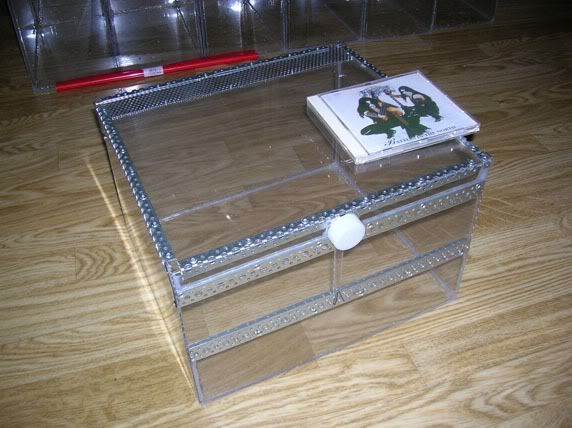
Next picture:
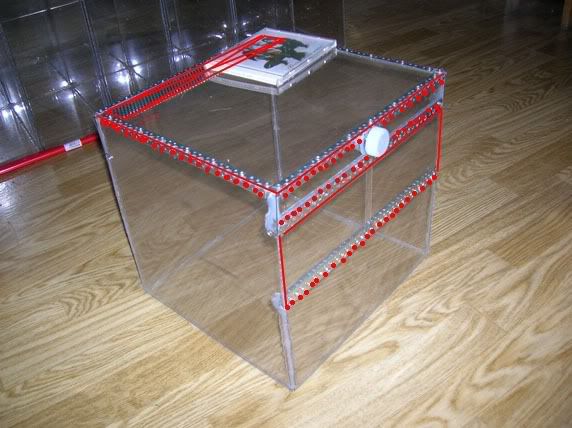
Top slider, a currently open feeding port, lid held above tank wall, and the holes on the top drilled into the wall are for extra airflow (I get into that a little later).
You can see a groove in the feeding port, that's where the edge of the lid sinks in when the lid is put on.
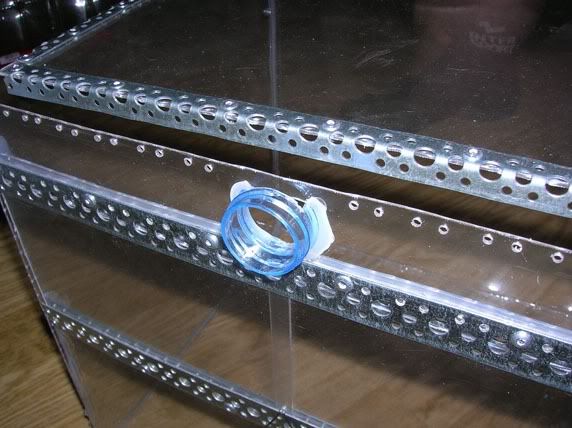
I bent hooks to hold the lid on safe and tight. Shown in the next two pictures:
They are riveted to the tank wall as you can see and again being piano wire - they pack quite a punch.
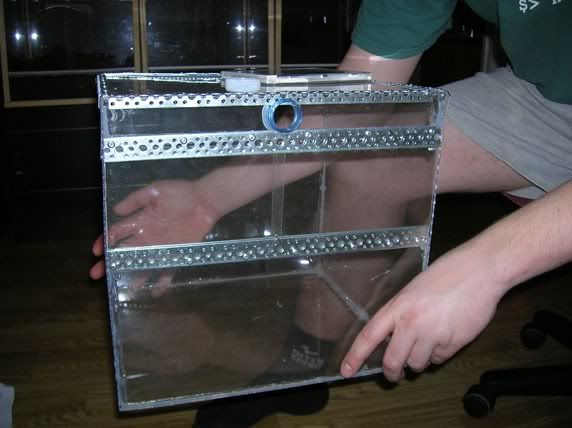
So, airflow. As already seen the tanks have top ventilation provided by the holeplate (I had 2 large sheets which I just cut to size). Other than that I have hidden all the other ventilation in most tanks. Here's a pic of what the ventilation actually is in one of those tanks (vent in red, ignore the red plastic in the background, I cover that later.) :
The main vent is still provided by the hole plate in the top, but for increased airflow I drilled extra holes all arround the tanks lid, and above and below the doors. The red lines indicate where the tank is untight, thus letting in air anyway, without me having to do anything about it.
Here a view on the inside of the door sliders:
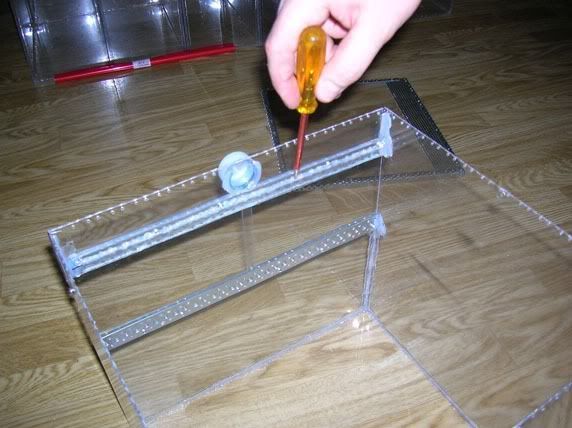
What I'm pointing out are the large holes (about 7mm and 4mm diameter) in the top door sliders. I glued them shut from the inside by glueing strips of plastic over them. I did that since the holes would have been exposed to the inside of the tank otherwise. They would have been a leg snagging hazard for a curious T, and even a very large individual would obviously have been able to push a leg through the larger holes, possibly getting stuck. The holes in the bottom sliders are basically closed up by the doors, so no need for adjustment there.
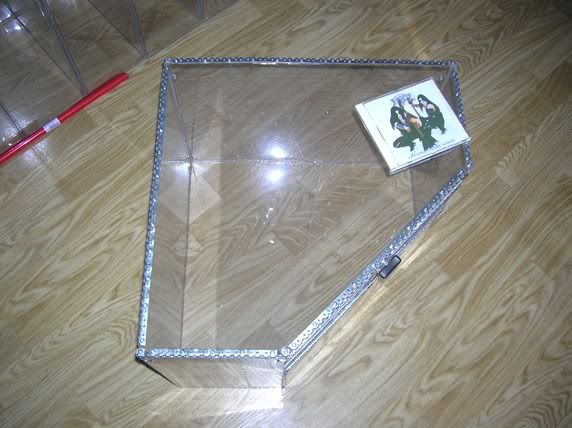
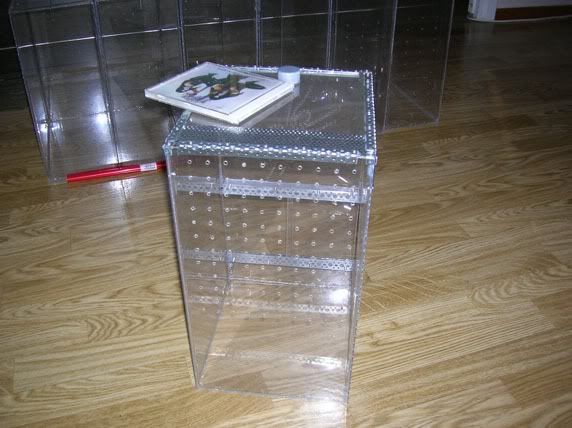
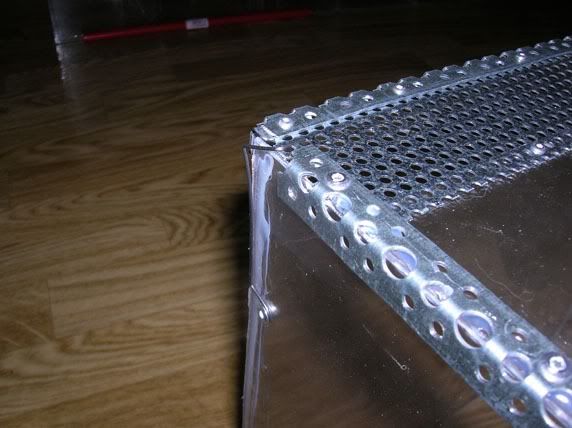
Another frontal shot with an open feeding port and lid on.
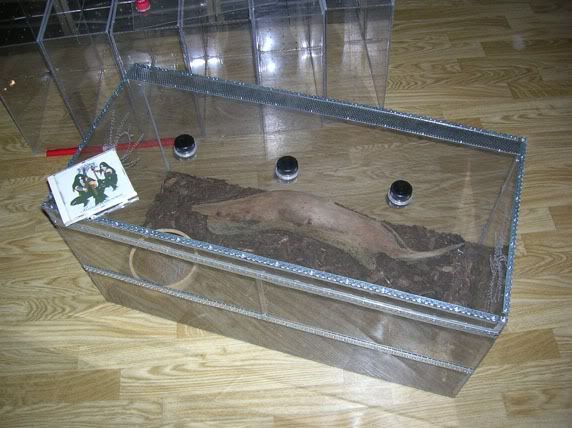
The tank I've presented up until now is a type designed for a medium sized ground dweller with slight digging ambitions (Brachypelma for example).
Here it is... the result of a small project I wanted to chip through during the christmas holidays... and which took a few months longer to complete (until yesterday).
22 new tanks are finally finished... though being done I realized I need 4 more tanks... I'll build them when I need them though. The tanks I built now where in great part built ahead of time, so I don't have T's to fill most of them. Many of the animals are still too small, some have died during this time and some where just planned and built because I had the space for them.
First up:
This is what I envisioned... it didn't turn out like that as you'll see. The tanks crossed out in red are purely imaginary, a concept so to speak. The six tanks not crossed out are actually there and where my initial stock of home made tanks. Those I had built about a year earlier and I learned a lot while building them. For example that 1.5mm plexi is a lot cheaper than glass. That the plexi is a lot more customizable but that it doesn't hold together well with silicone. They still stand but I'm skeptical that they will hold together forever.
So... I had to make some changes. For this big a project I had to go as cheap and practical as possible. The wood was to expensive, eventhough nice looking. It didn't either hold together well with silicone. My new sollution after a lot of brainstorming was this:
Yes, steel bands. They proved to be both a blessing and a curse. Cutting them to size was no problem. Bending individual corner pieces was no problem either. But actually hammering edge frames out of them was... no fun at all to put it mildly. On the contrary. The frames would always turn out warped (because the holes in the bands make straight hammering and bending impossible) so every single frame piece had then to be bend straight. Now imagine trying to bend an L-profiled piece of metal! If you apply pressure to one side, the other automatically comes out by the same amount, unless you basically use 3-4 hands applying pressure to the counterpoints too (or if you go at it with a great deal of patience). At times I'd apply too much pressure to it collapsing the entire frame piece and then having to bend it straight again from some very rediculously looking angle.
Well... But once they were kinda straight the problems weren't over. The prototype tank would turn out to look a complete mess: I had the very practical idea of riveting these bands to the plexi. Rivets hold (IF THEY ARE LONG ENOUGH!) pretty well. If they are too short, the rivet pulls through both plexi and metal and you have to manually drill the rivet head out of the frame piece. No fun at all! In one case the head pulling through the plexi completely messed up the plexi, I had to fix it by cutting it into shape again.
About the big mess I mentioned earlier - Those DIY bent L-profile bands looked straight enough so I tried applying them to all sides of the prototype tank. They were supposed to be the fundament to the tanks stability and shape. But they weren't: the tank ended up a competely warped mess and there was a lot of tension on it so there was no way I could simply manually bend or break it into shape after riviting on all the profile bands!
The bands where waaaay off for the kind of precission I needed for it to become a functional tank and the rivets pulling the bands and plexi together bent subsequently the plexi totally out of shape! I was this close to scrapping the entire project.
I had to come up with something else. ...Complete idea purge and a completely new start at everything... Making it simpler was the only way to go!
It took some time and thinking but I decided to go all plexi + bands + rivets + (and this is it: ) hot glue! (Not silicone!)
(The hot glue of choice: Industrial hot glue (stores more energy, longer staves), comming out of a full power 80W HG gun. If you have anything lower than 45W, throw it away, the glue will hold until you stop looking - IMHO)
Now I'd only apply the L-profile bands to the lid, to keep it steady and escape proof (rivited ofcourse). In order to NOT have the rivets with the "out of shape L-profiles" bend the lid out of shape I did a smart thing: I HOT GLUED the profile pieces to the lid before riveting - thus eliminating all warps they carried with them. After doing that the lids ended up without tension, warps or other! (Oh happy day!
)Here's what I'm talking about (the lid on the photo shows no hot glue between the profiles and the plexi - it's the only one that could be saved before changing strategy):
You can see a space between the rivets and the steel profile egde - that's where the tank wall is kept in place so it can bend neither in nor out, making the tank safer.
The rest of the tank would be hot glued together in its entirety.
Now... I wanted both a removable lid and sliding doors. Trying to keep it cheap I had to build the door sliders myself too. Obviously I had to remember making the top slider deeper than the bottom one so that the doors could be removed. Making the sliders out of the same bands as presented earlier was no less of a challenge but once I figured it out it was at least pretty straight forward.
Here you can see the bottom slider of a tank, including the lock holding the doors in place. The lock can only be pulled out, not be pushed out from the inside and since it's made of piano wire it sits pretty tight and can not fall off by itself either.
On the picture above you also see the rivets, plus plastic shining through the holes of the metal band. The plastic you can see there is what holds the doors up to the right height to create the bottom-slider-door-groove
.Next picture:
Top slider, a currently open feeding port, lid held above tank wall, and the holes on the top drilled into the wall are for extra airflow (I get into that a little later).
You can see a groove in the feeding port, that's where the edge of the lid sinks in when the lid is put on.
I bent hooks to hold the lid on safe and tight. Shown in the next two pictures:
They are riveted to the tank wall as you can see and again being piano wire - they pack quite a punch.
So, airflow. As already seen the tanks have top ventilation provided by the holeplate (I had 2 large sheets which I just cut to size). Other than that I have hidden all the other ventilation in most tanks. Here's a pic of what the ventilation actually is in one of those tanks (vent in red, ignore the red plastic in the background, I cover that later.) :
The main vent is still provided by the hole plate in the top, but for increased airflow I drilled extra holes all arround the tanks lid, and above and below the doors. The red lines indicate where the tank is untight, thus letting in air anyway, without me having to do anything about it.
Here a view on the inside of the door sliders:
What I'm pointing out are the large holes (about 7mm and 4mm diameter) in the top door sliders. I glued them shut from the inside by glueing strips of plastic over them. I did that since the holes would have been exposed to the inside of the tank otherwise. They would have been a leg snagging hazard for a curious T, and even a very large individual would obviously have been able to push a leg through the larger holes, possibly getting stuck. The holes in the bottom sliders are basically closed up by the doors, so no need for adjustment there.
Another frontal shot with an open feeding port and lid on.
The tank I've presented up until now is a type designed for a medium sized ground dweller with slight digging ambitions (Brachypelma for example).