Fighting glare in photos

Haemus

Arachnosquire
Joined
Feb 11, 2016
Messages
128
Hey fellow arachno guys and gals,

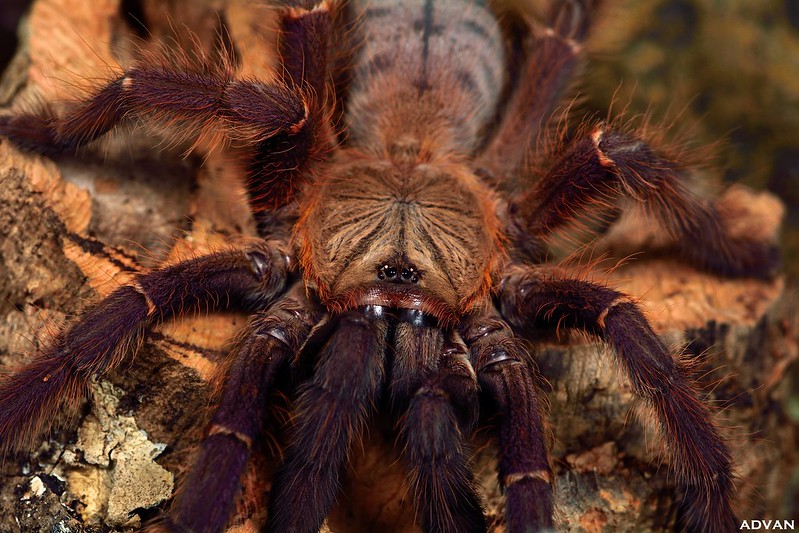
My job requires me to shoot a lot of products that are either glass, plastic, or metal. Because these materials have glare, it can be challenging to shoot and I've found similar challenges in shooting my tarantula collection. Here's how I've been working around the glare problem and lighting in general:

DSC_5609-right.jpg

No matter how I shoot my Ts, I always make sure there's a black surface on the side opposite of the camera. This applies if I'm using a mounted flash or if I'm using natural light. I always make my boards larger than my subjects to ensure full coverage. Now let's see the application.
Studio Session-634-compare.jpg

For this experiment I used a large softbox to mimic a large window above and slightly behind me on a cloudy day. The image on the left actually isn't too bad...as an overall shot. But if we zoom into the actual inhabitant, it becomes a completely different picture:
Studio Session-634-zoomed.jpg

As you can see, the white washes out the enclosure, and this is a common problem when shooting on a white table or surface. A small black board placed in the correct position easily remedies this, as will anything that is simple, non-reflective, and black.

Here's an example of a classic top down angle, and the effect of having a white wall versus the black board behind the enclosure:
Studio Session-644-compare.jpg Studio Session-644-zoomed.jpg

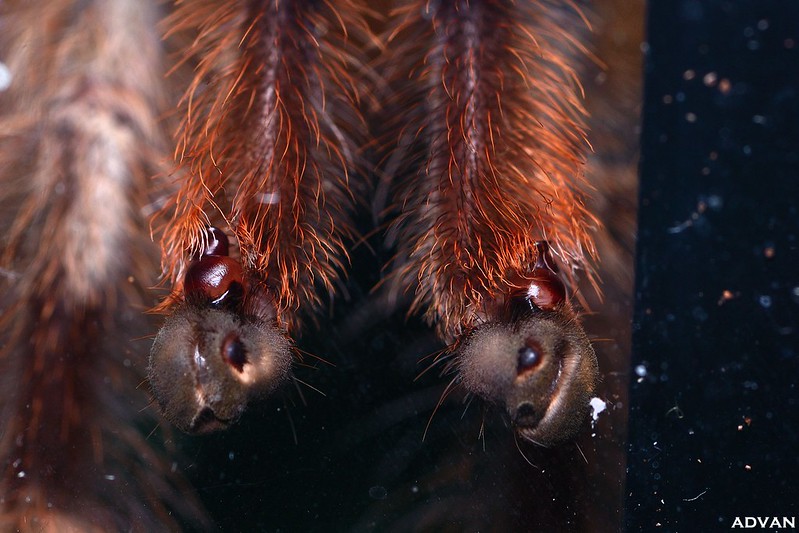
Now we're all thinking "Yeah, that's nice James, but what if we want the whole enclosure to be glare free?" Way ahead of you boss, here are the results in all black:
Studio Session-648.jpg Studio Session-654.jpg Studio Session-652.jpg

The last image is especially clear, with the air holes and light distortion in the blur being the only real tells. Surrounding the enclosure in black is definitely a great way to shoot through it. I'm very fond of this method as I still get uneasy when the lid is open.

Feel free to comment, criticize, or leave your tips/tricks :)
 

advan

oOOo
Staff member
Joined
Apr 11, 2010
Messages
2,086
With flash, you just need the flash to not bounce back into the camera's sensor. Adjust the flash angles until you get it right. :)

A few through glass or acrylic.


AphonopelmaTX

Moderator
Staff member
Joined
May 7, 2004
Messages
1,822
Can one use these techniques to take a photo of a tarantula, or anything really, resting on a clear acrylic platform to create a pure black background without light from a flash reflecting back into the camera?

I've been able to take still life photos (product photography) with pure black backgrounds by having my subjects resting far from a background and adjusting the flash to light up just the subject. I've wondered how to best go about using the same principle on a live tarantula. Having one rest on a clear platform to create distance between the spider and background, which would be a piece of black card under the platform, seems to be the way to go, but not sure of the glare produced from the flash.
 

The Snark

Dumpster Fire of the Gods
Old Timer
Joined
Aug 8, 2005
Messages
11,048
I remember doing something similar. My ex had an art studio with poor lighting. Her paintings suffered. I mounted three halogen flood lights in the ceiling directed at the wall beside her. On the wall, covering most of it, we painted the natural rainbow. That gave her full color spectrum lighting. Halogen bulbs are very inefficient but give excellent mid spectrum light.
 
Last edited:

Haemus

Arachnosquire
Joined
Feb 11, 2016
Messages
128
Can one use these techniques to take a photo of a tarantula, or anything really, resting on a clear acrylic platform to create a pure black background without light from a flash reflecting back into the camera?

I've been able to take still life photos (product photography) with pure black backgrounds by having my subjects resting far from a background and adjusting the flash to light up just the subject. I've wondered how to best go about using the same principle on a live tarantula. Having one rest on a clear platform to create distance between the spider and background, which would be a piece of black card under the platform, seems to be the way to go, but not sure of the glare produced from the flash.
Interesting, I think this concept would work so long as you're black card is far enough away from the light to avoid getting lit. Watch out for dust as well, they really catch glare for some reason :)
 

AphonopelmaTX

Moderator
Staff member
Joined
May 7, 2004
Messages
1,822
Interesting, I think this concept would work so long as you're black card is far enough away from the light to avoid getting lit. Watch out for dust as well, they really catch glare for some reason :)
I pulled a glass shelf from my wall and tried it out for a while. Both your and advan's techniques combined works for a top down photograph of a subject on a clear surface away from black card to get a jet black background. Perfect for what I am trying to accomplish. I always hated product photography where the subject is photographed resting on a black surface because the background always has a light grey to blue hue due to light reflection from the surface.

I noticed using a flash the light source has to be at an angle to not cause reflections from the glass. Overhead lighting or the flash being too close to the subject creates glare and reflections. This is going to take a lot of trial and error to get the lighting just right. You are right about dust though. Using glass as a stage, it has to be perfectly clean and free from dust and finger prints.

I'm going to practice more this weekend and hopefully get some shots up in this thread. My practice shots tonight were pretty bad, but at least I can see the technique works.
 

Haemus

Arachnosquire
Joined
Feb 11, 2016
Messages
128
@AphonopelmaTX Looking forward to seeing them :) As @advan advises, so long as the light source isn't bouncing into the camera, you're good to go. Sometimes I'm too lazy to figure that out, so I place a small mirror on the surface of where I'm shooting. If I don't see my lights or bright white areas on the mirror through my camera's viewfinder, I know my angle is perfect.

@xunicronx thanks!
 

AphonopelmaTX

Moderator
Staff member
Joined
May 7, 2004
Messages
1,822
@AphonopelmaTX Looking forward to seeing them :) As @advan advises, so long as the light source isn't bouncing into the camera, you're good to go. Sometimes I'm too lazy to figure that out, so I place a small mirror on the surface of where I'm shooting. If I don't see my lights or bright white areas on the mirror through my camera's viewfinder, I know my angle is perfect.

@xunicronx thanks!
I did some more tests using my keys for practice and attached the best one. It didn't turn out too bad, but wasn't as good as I would have hoped. I attached the original as it came from the camera with a bit of cropping only and an edited one done fairly quickly using the Mac's included Photos program. In case you are not familiar with the Mac's Photos app, it is basically Adobe Lightroom Jr.

You can see in the original that there is quite a bit of reflection and glare in the glass from imperfections I couldn't get out before taking pictures. The edited one has a nice black background, but at the sacrifice of losing some detail in the keys. If I was using something like Adobe Lightroom, I bet I could have done a better job in editing since I would be able to use masks and edit the keys separate from the background. Due to the lack of proper lighting, the keys are too dark in my opinion and the color isn't accurate. All in all though, it was a good test of the concept of this thread considering the keys are resting on a plate of glass with black poster board underneath. The only real difference is my subject is sitting on top of of a clear surface, and your and Advan's subject is behind it.

The only light source in my pics is a single Canon 430 EX II speed light diffused by using bounce flash with a Flashbender. I wonder if that is what was causing a bunch of glare and reflection in the glass now that I think about it.

Anyway, let me know what you think.
 

Attachments

Last edited:

Haemus

Arachnosquire
Joined
Feb 11, 2016
Messages
128
I did some more tests using my keys for practice and attached the best one. It didn't turn out too bad, but wasn't as good as I would have hoped. I attached the original as it came from the camera with a bit of cropping only and an edited one done fairly quickly using the Mac's included Photos program. In case you are not familiar with the Mac's Photos app, it is basically Adobe Lightroom Jr.

You can see in the original that there is quite a bit of reflection and glare in the glass from imperfections I couldn't get out before taking pictures. The edited one has a nice black background, but at the sacrifice of losing some detail in the keys. If I was using something like Adobe Lightroom, I bet I could have done a better job in editing since I would be able to use masks and edit the keys separate from the background. Due to the lack of proper lighting, the keys are too dark in my opinion and the color isn't accurate. All in all though, it was a good test of the concept of this thread considering the keys are resting on a plate of glass with black poster board underneath. The only real difference is my subject is sitting on top of of a clear surface, and your and Advan's subject is behind it.

The only light source in my pics is a single Canon 430 EX II speed light diffused by using bounce flash with a Flashbender. I wonder if that is what was causing a bunch of glare and reflection in the glass now that I think about it.

Anyway, let me know what you think.
Thanks for providing both the unedited and edited photos. The Canon 430 strobe is mounted on the camera correct? If so, try aiming the strobe at a 45° angle to the camera. use white boards at a slight angle to avoid catching glare. This will also fill the top and bottom of the keys with light, and should help bring out the detail in the outlines.
DSC_5609-2.jpg
Watch the angle of the whiteboards. If you see a white line at the top or bottom, that's glare from the boards, so lean them away more or back them away from the keys. If you want to add more fill, add white boards at a similar angle to the sides. Oh, and you can also add light under the clear surface at the same angles, and it'll avoid glare too! This is essentially how I light jewelry on black for my own photography. When the outlines of your subject are lit well, when you go into post editing it is very easy to darken out the background without losing any edges. Hope this helps :)
 

AphonopelmaTX

Moderator
Staff member
Joined
May 7, 2004
Messages
1,822
Thanks for providing both the unedited and edited photos. The Canon 430 strobe is mounted on the camera correct? If so, try aiming the strobe at a 45° angle to the camera. use white boards at a slight angle to avoid catching glare. This will also fill the top and bottom of the keys with light, and should help bring out the detail in the outlines.
View attachment 246186
Watch the angle of the whiteboards. If you see a white line at the top or bottom, that's glare from the boards, so lean them away more or back them away from the keys. If you want to add more fill, add white boards at a similar angle to the sides. Oh, and you can also add light under the clear surface at the same angles, and it'll avoid glare too! This is essentially how I light jewelry on black for my own photography. When the outlines of your subject are lit well, when you go into post editing it is very easy to darken out the background without losing any edges. Hope this helps :)
I mounted the flash on a tripod and directed it at an angle. Using the Flashbender thing on the flash, the light was bouncing off the white reflective fabric and onto the subject. The way I took the picture of my keys was probably the worst possible way to do it. I won't even try to describe it because it was so bad. :) You provided really good suggestions though and I appreciate it! Thanks for starting this topic as it was something I've been curious about for quite a while but never could find tutorials on how to do it exactly.
 

Haemus

Arachnosquire
Joined
Feb 11, 2016
Messages
128
I mounted the flash on a tripod and directed it at an angle. Using the Flashbender thing on the flash, the light was bouncing off the white reflective fabric and onto the subject. The way I took the picture of my keys was probably the worst possible way to do it. I won't even try to describe it because it was so bad. :) You provided really good suggestions though and I appreciate it! Thanks for starting this topic as it was something I've been curious about for quite a while but never could find tutorials on how to do it exactly.
I'm happy to contribute! Without this forum I would have never gained the confidence to collect tarantulas :)

I won't lie I'm now curious to see how they turned out lol. I'm going to do a light test with a molt (I'm too scared to try with a live one), and I'll share my good/bad results.
 

advan

oOOo
Staff member
Joined
Apr 11, 2010
Messages
2,086
I did some more tests using my keys for practice and attached the best one. It didn't turn out too bad, but wasn't as good as I would have hoped. I attached the original as it came from the camera with a bit of cropping only and an edited one done fairly quickly using the Mac's included Photos program. In case you are not familiar with the Mac's Photos app, it is basically Adobe Lightroom Jr.

You can see in the original that there is quite a bit of reflection and glare in the glass from imperfections I couldn't get out before taking pictures. The edited one has a nice black background, but at the sacrifice of losing some detail in the keys. If I was using something like Adobe Lightroom, I bet I could have done a better job in editing since I would be able to use masks and edit the keys separate from the background. Due to the lack of proper lighting, the keys are too dark in my opinion and the color isn't accurate. All in all though, it was a good test of the concept of this thread considering the keys are resting on a plate of glass with black poster board underneath. The only real difference is my subject is sitting on top of of a clear surface, and your and Advan's subject is behind it.

The only light source in my pics is a single Canon 430 EX II speed light diffused by using bounce flash with a Flashbender. I wonder if that is what was causing a bunch of glare and reflection in the glass now that I think about it.

Anyway, let me know what you think.
I haven't really tried the set up and results you are looking for but @mygale has/does with spiders. Hopefully he can chime in.

Click for some of his examples>>> http://arachnoboards.com/threads/mygales-photo-thread.279519/#post-2433288
 

mygale

Arachnoknight
Joined
Dec 6, 2015
Messages
196
Hey, I've read the whole thread but I'm not entirely sure what you're looking for. A solution for a 100% black/white background? How to edit it? Or how to photograph them without reflections of the glass inside the enclosure? I have solutions for everything haha.

I have for everything a different setup, depending on the size of the T, the background color and the position (dorsal/ventral), the light is often the same, only 2 wireless Yongnou flashlights with a 10$ softbox, so there's not much magic there when it comes to avoiding the glare. I'm currently writing articles about that, one in particular about the black/white thing, however, I doubt that they are very helpful as they're in German only so far.

Examples, always 100% black white, even the hairs.

dorsal black

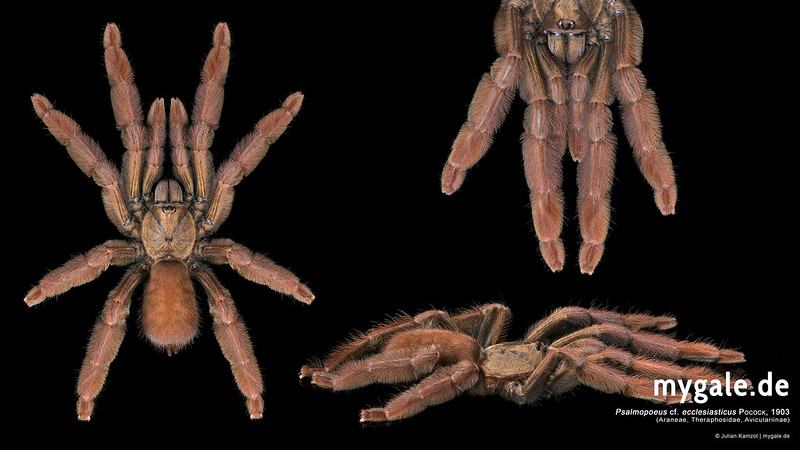
Psalmopoeus cf. ecclesiasticus black by mygale, auf Flickr

Here with a very small sling:
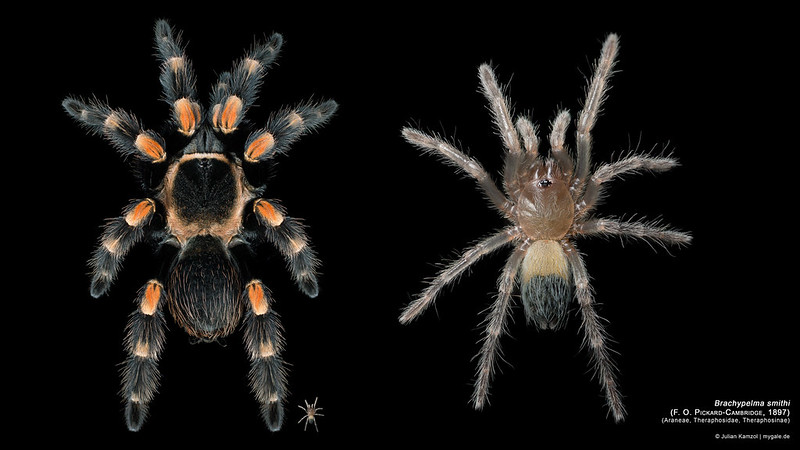
Brachypelma smithi (F. O. Pickard-Cambridge, 1897) Poster 1/4 by mygale, auf Flickr

black with reflection

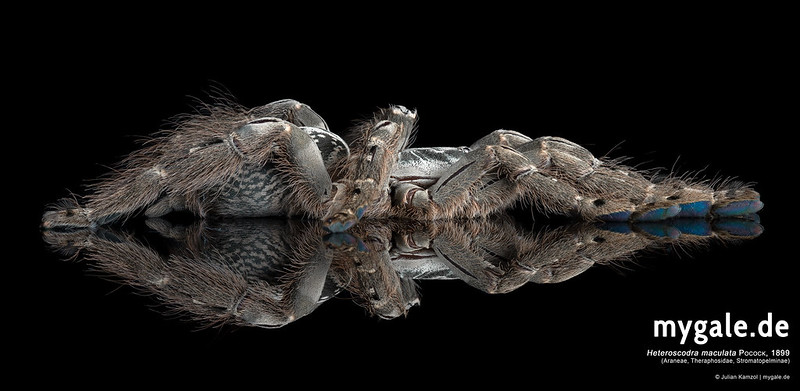
Heteroscodra maculata by mygale, auf Flickr

ventral black

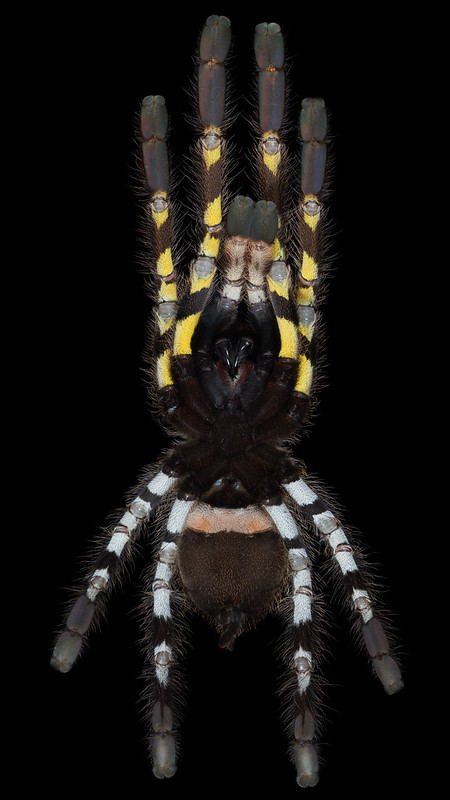
Poecilotheria regalis Pocock, 1899
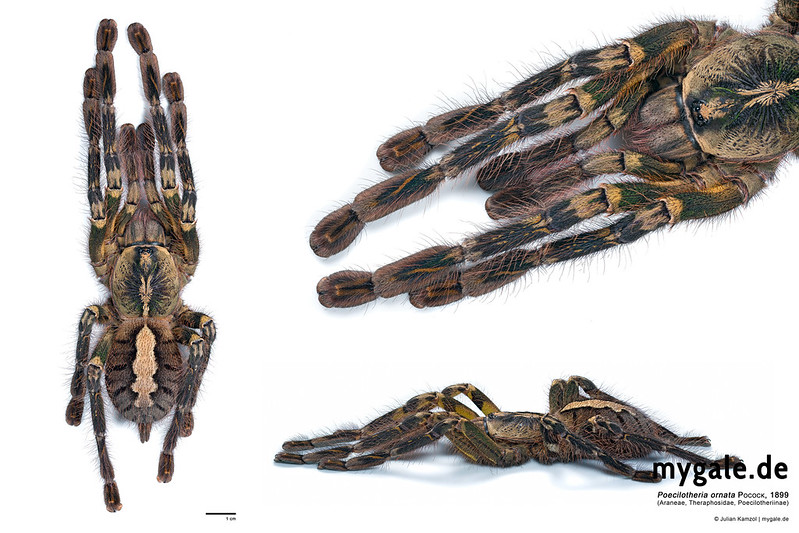
 by mygale, auf Flickr

dorsal white

P. ornata white by mygale, auf Flickr

ventral white

P. subfusca and P. spec. "lowland" ventral by mygale, auf Flickr

Nowadays they are all stacked and all in the same position, doing this with a whole genus for a poster is the real challenge.
 
Last edited:

AphonopelmaTX

Moderator
Staff member
Joined
May 7, 2004
Messages
1,822
Hey, I've read the whole thread but I'm not entirely sure what you're looking for. A solution for a 100% black/white background? How to edit it? Or how to photograph them without reflections of the glass inside the enclosure? I have solutions for everything haha.
I'm terribly wordy when it comes to asking questions, so I will make it short. The question is, how do you photograph a tarantula from the top, or bottom, to get a clean black background without reflections? Also, how do you mount the camera to get an overhead (dorsal) shot?

I will leave it at that so I don't confuse anyone, but I am thinking it involves taking the photo while the tarantula is resting on a piece of glass or acrylic.
 

mygale

Arachnoknight
Joined
Dec 6, 2015
Messages
196
how do you mount the camera to get an overhead (dorsal) shot?
I do everything free hand.

Here's a simple setup for dorsal/black. The spider in the middle and 2 flashlights left/right. You don't get any flash reflections at all as long you're in the red area, so there's still plenty of space left for the spider to walk around. Reflections of the spider itself are removed during the editing. If you're having internal reflections by extension tubes or adapter that's something else.

2017-07-21 22.56.28.jpg
 

AphonopelmaTX

Moderator
Staff member
Joined
May 7, 2004
Messages
1,822
I do everything free hand.

Here's a simple setup for dorsal/black. The spider in the middle and 2 flashlights left/right. You don't get any flash reflections at all as long you're in the red area, so there's still plenty of space left for the spider to walk around. Reflections of the spider itself are removed during the editing. If you're having internal reflections by extension tubes or adapter that's something else.
If I am understanding your picture of the setup, then the spider is on a mirror and the black background is produced by the reflection of the black fabric above it? It's hard to tell what is going on. It looks like you took the setup picture from above a mirror.
 
Top